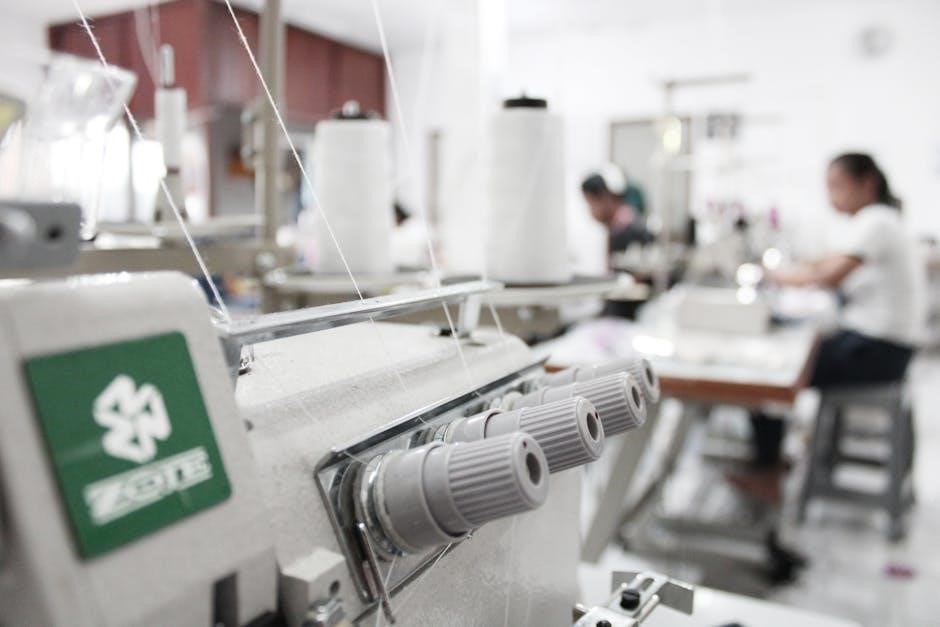
Sewing machines are essential tools for creating and repairing garments, offering precision and efficiency. From basic mechanical models to advanced computerized versions, they empower sewists of all skill levels.
1.1 Brief History of Sewing Machines
The invention of sewing machines revolutionized textiles and garment production. The first practical sewing machine was patented by Elias Howe in 1846, featuring the lockstitch design. Early models were mechanical, with subsequent innovations like Isaac Singer’s portable machine in 1851 making them more accessible. Over time, sewing machines evolved from industrial tools to household essentials, with computerized versions emerging in the late 20th century. This evolution transformed sewing, enabling mass production and empowering home sewists to create efficiently and creatively.
1.2 Importance of Sewing Machines in Modern Sewing
Sewing machines are indispensable in modern sewing, offering unmatched efficiency and versatility. They enable precise stitching, handle diverse fabrics, and streamline both home and industrial garment production. With advanced features like automatic threading and customizable stitches, they empower sewists to create intricate designs effortlessly. Sewing machines have democratized fashion, allowing individuals to craft custom clothing, home decor, and unique textiles. Their role in preserving traditional sewing techniques while embracing innovation makes them a cornerstone of contemporary needlework.
Choosing the Right Sewing Machine
Selecting the right sewing machine involves considering your sewing needs, fabric types, and desired features. Mechanical or computerized, it should suit your skill level and projects.
2.1 Mechanical vs. Computerized Sewing Machines
Mechanical sewing machines are simple, durable, and ideal for basic sewing tasks, offering manual control over stitch length and width. They are often preferred for heavy-duty fabrics and straight-stitch projects. Computerized machines, on the other hand, feature advanced stitch options, automatic threading, and embroidery capabilities, making them versatile for complex designs. While mechanical machines are easier to maintain, computerized ones provide more creativity and convenience, especially for experienced sewists. Choosing between them depends on your sewing goals, fabric types, and desired versatility.
2.2 Best Sewing Machines for Beginners
Beginners should opt for user-friendly machines with essential features. The Singer Heavy Duty 4423 is a popular choice, offering durability and simplicity with manual stitch controls. Janome and Brother models are also recommended for their ease of use and versatility. These machines typically include basic stitches, automatic bobbin winders, and free-arm designs, making them ideal for learning. They balance affordability with functionality, ensuring a smooth start for new sewists without overwhelming them with complex settings.
2.3 Factors to Consider When Buying a Sewing Machine
When selecting a sewing machine, consider your budget, sewing goals, and fabric types. Mechanical machines are ideal for simplicity, while computerized models offer more stitches and features. Check the number of built-in stitches, automatic needle threaders, and free-arm designs. Additional features like embroidery or quilting capabilities may be useful. Durability, brand reputation, and warranty are also important. Reading reviews and testing machines in person can help ensure the right fit for your needs, whether you’re a beginner or an advanced sewist.
Essential Accessories for Sewing Machines
Essential sewing machine accessories include various presser feet, high-quality threads, and maintenance tools. These enhance functionality, ensuring precise stitching and extending machine longevity for optimal sewing experiences.
3.1 Types of Sewing Machine Feet and Their Uses
Sewing machine feet are versatile tools that enhance stitching accuracy and fabric handling. The walking foot is ideal for heavy fabrics, ensuring smooth movement. The rolled hem foot perfects narrow hems, while the zigzag foot is great for general sewing. Specialty feet like the blind hem foot and overlock foot cater to specific techniques. Each foot solves unique challenges, offering precision and control for various projects, from garments to home decor.
3.2 Importance of High-Quality Thread and Needles
High-quality thread and needles are crucial for achieving professional results in sewing. The right thread ensures strong, durable stitches, while proper needles prevent fabric damage and breakage. Using thread that matches your fabric type and weight guarantees optimal performance. Similarly, selecting the correct needle size and type for your fabric prevents puckering, skipped stitches, or thread tangling. Investing in premium thread and needles minimizes sewing issues, enhances stitch quality, and extends the life of your projects, making them look polished and professional.
3.3 Must-Have Tools for Sewing Machine Maintenance
Regular maintenance is key to keeping your sewing machine functioning smoothly. Essential tools include a small brush for removing dust and lint, sewing machine oil to lubricate moving parts, and a screwdriver for tightening loose screws. Additionally, a clean cloth helps wipe down surfaces, while a needle inserter ensures proper needle alignment. A spool of high-quality thread and a set of replacement needles are also must-haves. These tools help prevent issues like skipped stitches, thread tangling, or mechanical jams, ensuring your machine runs efficiently and reliably over time.

Threading and Bobbin Management
Proper threading and bobbin management are crucial for smooth sewing machine operation. Ensure the thread flows evenly and the bobbin is correctly wound to prevent tangles or breaks. Patience is key to avoiding common mistakes that can disrupt your sewing process. Always follow the machine’s guidelines for threading and bobbin insertion to achieve consistent results and maintain your machine’s performance over time. This step ensures your projects are seamless and professional-looking. Proper technique prevents frustration and wasted materials, making it a fundamental skill for all sewists. By mastering these basics, you’ll enhance your sewing experience and the quality of your work. Regular practice will help you develop muscle memory, making the process quicker and more efficient. Remember, a well-threaded machine and correctly inserted bobbin are the foundation of successful sewing. Take the time to get it right, and your machine will reward you with flawless stitches every time. Happy sewing!
However, to meet the 25-word requirement, here’s a revised version:
Proper threading and bobbin management ensure smooth sewing machine operation. Correctly winding and inserting the bobbin prevents tangles and breaks, while even thread flow avoids common mistakes. Patience and attention to detail are essential for seamless stitching and professional results, making this a fundamental skill for all sewists to master.
4.1 Step-by-Step Guide to Threading Your Sewing Machine
Threading your sewing machine correctly is essential for smooth operation. Start by turning the machine off and removing any leftover thread. Locate the spool pin and guide the thread through the machine’s tension discs. Follow the path outlined in your user manual, ensuring the thread passes through each take-up lever and tension spring without twisting. Gently pull the thread to set the tension, then bring it down to the needle, leaving a small loop. Insert the thread through the needle’s eye from front to back, and gently tug to remove any slack. Finally, test the thread by sewing a few stitches on scrap fabric to ensure even stitching and proper tension. This process ensures your machine runs smoothly and prevents common issues like skipped stitches or thread breakage. Regular practice will make threading second nature, allowing you to focus on your sewing projects with confidence. Always refer to your machine’s specific guidelines for the best results, as threading mechanisms can vary between models. By following these steps carefully, you’ll achieve professional-quality stitches every time. Proper threading is the foundation of successful sewing, so take the time to master this skill. Your machine will thank you with flawless performance, and your projects will reflect the care you’ve taken in preparation. Happy sewing!
4.2 How to Properly Wind and Insert a Bobbin
To wind a bobbin, start with an empty one and cut a small piece of thread. Tie the thread to the bobbin’s notch, then wind it evenly, keeping the thread taut. Use the machine’s bobbin winder or manually wind it, ensuring no overlaps or twists. Once full, cut the thread, leaving a tail. To insert, open the bobbin compartment, place it inside, and guide the thread through the machine’s tension spring. Close the compartment and gently pull the thread to ensure it’s seated correctly. Always refer to your machine’s manual for specific instructions, as bobbin insertion can vary. Properly wound and inserted bobbins ensure smooth stitching and prevent issues like uneven tension or thread tangling. Regular maintenance and correct bobbin usage extend the life of your machine and enhance sewing quality. By following these steps, you’ll achieve consistent results and avoid common sewing frustrations. Happy sewing!
4.3 Common Mistakes to Avoid When Threading
One of the most common mistakes when threading a sewing machine is not cutting the thread at an angle or leaving too long a tail, which can cause tangles. Another error is neglecting to pull the thread gently after threading to ensure it’s properly seated. Incorrect tension adjustment can also lead to uneven stitching. Always follow the machine’s manual for threading, as improper techniques can damage the machine or result in poor stitch quality. Avoid using low-quality thread, as it may fray or break easily. Regularly cleaning dust and debris from the machine’s threading area can prevent issues. Patience and practice are key to mastering this essential skill. Proper threading ensures smooth operation and professional-looking results. By avoiding these mistakes, you’ll enjoy a more efficient and enjoyable sewing experience.
Understanding Stitch Types and Selection
Sewing machines offer various stitch types, from basic straight and zigzag stitches to decorative and specialized options. Proper stitch selection ensures optimal results for different fabrics and projects.
5.1 Basic Stitch Types Every Sewist Should Know
The straight stitch is fundamental, suitable for most fabrics and straight seams. The zigzag stitch is ideal for stretchy materials and preventing fraying. The backstitch reinforces seams, while the running stitch is perfect for hand-guided repairs. Each stitch type serves a unique purpose, ensuring durability and professional finishes. Understanding these basics enhances sewing efficiency and versatility, making them essential for every sewist to master.
5.2 How to Select the Right Stitch for Your Fabric
Selecting the right stitch for your fabric ensures strong, professional-looking seams. For woven fabrics like cotton or linen, the straight stitch is ideal. Stretchy fabrics, such as knits, require a zigzag or overlock stitch to allow flexibility. Heavy-duty fabrics benefit from a heavy-duty straight stitch, while delicate fabrics like silk or chiffon need a short, fine straight stitch. Matching the stitch type to fabric ensures optimal results, preventing breakage and enhancing durability.
5.3 Adjusting Stitch Length and Width for Optimal Results
Adjusting stitch length and width is crucial for achieving professional-looking seams. Longer stitches are ideal for heavy-duty fabrics, while shorter stitches suit delicate materials. For stretchy fabrics, a wider zigzag stitch prevents breaking. Use a narrower straight stitch for lightweight fabrics like silk. Test settings on scrap fabric to ensure proper tension and appearance. Adjusting these settings enhances stitch quality, ensuring durability and a polished finish for your sewing projects.
Tension Control and Adjustment
Proper tension ensures balanced stitching, preventing puckering or loose threads. Adjusting upper and lower thread tensions is vital for smooth sewing and consistent results across fabrics.
6.1 Understanding Tension in Sewing Machines
Tension in sewing machines refers to the balance of thread tightness between the upper and lower threads. Proper tension is crucial for consistent stitching and fabric movement. If tension is too tight, it can cause fabric puckering or thread breakage. Conversely, loose tension may result in uneven stitches or loops on the underside of the fabric. Achieving the right tension ensures smooth sewing and professional-looking results. Regular adjustment is necessary, especially when switching fabrics or thread types.
6.2 How to Adjust Tension for Different Fabrics
Adjusting tension for different fabrics ensures optimal stitching and prevents issues like puckering or loose threads. Start by threading your machine and testing the tension on a scrap fabric. For lightweight fabrics like silk or cotton, reduce tension to avoid tight stitches. For heavy fabrics such as denim or canvas, increase tension to maintain straight, even stitching. Always refer to your machine’s manual for specific tension adjustment guidelines, as settings may vary by fabric type and machine model. Proper tension adjustment enhances sewing quality and fabric performance.
6.3 Troubleshooting Common Tension Issues
Common tension issues include uneven stitches, puckering, or thread breaking. If the top thread is too tight, it may cause fabric to pucker. Loosen the tension slightly and test on scrap fabric. For loose stitches, tighten the bobbin tension or adjust the top thread. Thread breaking often results from incorrect threading or dull needles. Re-thread the machine and replace the needle if necessary. Always refer to your machine’s manual for specific troubleshooting steps, as tension adjustments vary by model. Proper tension ensures smooth stitching and professional results.
Maintenance and Servicing
Regular cleaning, oiling, and servicing ensure optimal performance. Remove dust, oil moving parts, and replace worn components. Refer to your manual for specific care instructions.
7.1 Cleaning and Oiling Your Sewing Machine
Cleaning and oiling are crucial for maintaining your sewing machine. Use a soft brush to remove dust and lint from the bobbin area and feed dogs. Apply a few drops of sewing machine oil to moving parts, following the manual’s guidelines. Regular lubrication ensures smooth operation and prevents mechanical issues. Always unplug the machine before cleaning to avoid accidents. This simple routine extends the life of your machine and keeps it running efficiently.
7.2 How to Service Your Sewing Machine at Home
Regular servicing at home can prevent major issues. Start by removing dust and lint with a soft brush, focusing on the bobbin area and feed dogs. Lightly oil moving parts, following the manual’s instructions. Check for worn or damaged components and replace them promptly. This practice helps maintain smooth operation, prevents skipped stitches, and ensures proper tension. Servicing at home is a cost-effective way to keep your machine in optimal condition and extend its lifespan.
7.3 When to Seek Professional Servicing
While home maintenance is crucial, some issues require professional attention. If your machine has persistent problems like skipped stitches, uneven tension, or mechanical failure, consult a professional. Internal adjustments, such as timing issues or complex electronic component repairs, are best handled by experts. Additionally, if you’re unsure about advanced repairs or lack specialized tools, seeking professional servicing ensures proper resolution. Regular professional check-ups can also prevent major breakdowns and extend your machine’s lifespan, maintaining its performance and reliability over time.

Troubleshooting Common Issues
Identify and resolve common sewing machine problems like skipped stitches, thread pulling, or uneven tension. Regularly clean and oil your machine to prevent malfunctions and ensure smooth operation.
8.1 Diagnosing and Fixing Skipped Stitches
Skipped stitches occur when the needle fails to penetrate the fabric, often due to improper tension, dull needles, or incorrect presser foot usage. To fix, ensure the machine is threaded correctly and replace the needle if worn. Adjust tension settings and test on scrap fabric. Using the right needle type for your fabric can also resolve this issue. Regular maintenance, like cleaning and oiling, helps prevent skipped stitches and keeps your machine functioning smoothly. Always refer to your user manual for specific guidance.
8.2 Solving Thread Pulling or Tucking Problems
Thread pulling or tucking issues often arise from uneven tension, incorrect needle size, or poor thread quality. Check tension settings and adjust as needed for the fabric type. Use high-quality thread suitable for your project and ensure the needle is appropriate for the fabric. Regularly clean and oil your machine to prevent dust buildup, which can cause thread drag. If issues persist, inspect the bobbin area for proper alignment and ensure the presser foot is correctly positioned. Testing on scrap fabric can help identify and resolve the problem effectively.
8.3 Addressing Fabric Feeding Issues
Fabric feeding issues, such as uneven movement or dragging, can disrupt sewing. Ensure the presser foot is properly aligned and adjusted for your fabric type. Using a walking foot or Teflon foot can improve handling of thick or slippery fabrics. Always pre-test fabric scraps to confirm settings. Keep feed dogs clean and free of debris, as dust can hinder smooth operation. Adjusting stitch length and tension may also resolve feeding problems. Regular machine maintenance, like oiling and cleaning, ensures optimal performance and prevents fabric feeding difficulties.
Special Techniques and Features
Explore advanced sewing techniques like using the walking foot for heavy fabrics, mastering the rolled hem foot, and sewing in reverse for professional finishes and intricate designs.
9.1 Using the Walking Foot for Heavy Fabrics
The walking foot is a specialized sewing machine attachment designed to handle thick or heavy fabrics. It ensures smooth fabric feeding by moving in synchronization with the machine’s feed dogs. This prevents bunching and dragging, making it ideal for materials like denim, canvas, and leather. By providing consistent tension, the walking foot helps maintain straight seams and reduces the risk of fabric shifting during stitching, enhancing overall accuracy in heavy-duty projects.
9.2 Mastering the Rolled Hem Foot
The rolled hem foot is a versatile sewing machine attachment perfect for creating narrow, professional-looking hems. It is especially useful for delicate fabrics like silk and chiffon. The foot guides the fabric edge into a narrow roll, preventing fraying and ensuring a clean finish. To use it effectively, align the fabric edge with the foot’s guide, maintain steady tension, and sew slowly. This technique is ideal for garments requiring a lightweight hem, such as dresses or scarves, and adds a professional touch to your sewing projects.
9.3 Sewing in Reverse: Tips and Tricks
Sewing in reverse is a handy technique for reinforcing seams, especially at the beginning and end of stitching. To do it effectively, use the reverse stitch button on your machine. Common issues include improper backtacking and uneven fabric feeding. To avoid these, ensure fabric is aligned correctly and tension is adjusted. For thick fabrics, a heavier-duty needle is recommended. Always test reverse sewing on scrap fabric first to ensure settings are correct. This technique is particularly useful for durable stitching on heavy materials like denim or canvas.
Advanced Sewing Projects
Advanced sewing projects include creating tailored garments, home decor, and custom embroidery. These tasks require precision, specialized feet, and often computerized machine features for intricate designs and patterns.
10.1 Sewing Garments from Scratch
Sewing garments from scratch involves creating custom-fit clothing using patterns or measurements. Start by selecting fabric suited to your project, then cut pieces accurately. Use your sewing machine to assemble seams, ensuring proper tension and stitch selection. Techniques like serging or zigzagging can finish raw edges. Advanced features such as embroidery or special feet can enhance details. Practice on scrap fabric before working on final materials to ensure precision and avoid costly mistakes. This method allows for personalized styles and unique designs tailored to individual preferences, making each garment truly one-of-a-kind.
10.2 Creating Home Decor Items with Your Sewing Machine
Create functional and stylish home decor items like curtains, pillowcases, and table runners using your sewing machine. Start by measuring spaces and selecting fabrics that match your interior design. Use straight seams for simplicity or add decorative stitching for a personalized touch. Serging raw edges ensures durability, while embroidery or appliqué can add elegance. Patterns or templates guide precise cuts, and adjustable stitch lengths help tailor fits. These projects are perfect for beginners, allowing practice with various fabrics and techniques while enhancing your living space with custom-made decor.
10.3 Customizing Clothes with Embroidery and Appliqué
Embroidery and appliqué are versatile techniques for personalizing clothing. Use embroidery to add intricate designs, monograms, or patterns directly onto fabric. Appliqué involves attaching pre-cut shapes or designs, creating unique motifs. Stabilizing materials like interfacing or heat-and-sew products ensure crisp results. Combine these methods to enhance garments, bags, or accessories. Experiment with contrasting colors and creative placement to make your designs stand out. These techniques allow for endless creativity, transforming basic clothes into one-of-a-kind pieces that reflect personal style and craftsmanship.

Resources for Further Learning
Explore books, online forums, and video tutorials for advanced sewing techniques. Websites like PatternReview.com and YouTube offer valuable guides for mastering sewing machine operations and projects.
11.1 Recommended Books for Sewing Machine Users
Several books are highly recommended for sewing machine users, offering in-depth guides and tips. The Complete Book of Sewing Machines by Tanya Wolf provides comprehensive insights into machine maintenance and troubleshooting. Sewing Machine Mastery by Nancy Zieman focuses on advanced techniques and customizing fabrics. The Sewing Machine Handbook covers essential skills and projects for all skill levels. These resources are invaluable for both beginners and experienced sewists seeking to enhance their skills and explore new creative possibilities.
11.2 Online Communities and Forums
Online communities and forums are invaluable for sewing machine users, offering shared knowledge and support. Platforms like PatternReview.com and Facebook groups dedicated to sewing provide spaces to discuss techniques, troubleshoot issues, and showcase projects. Reddit’s r/sewing community is another hub for advice and inspiration. Specialized forums for brands like Janome and Elna also offer model-specific guidance. These resources foster collaboration and learning, helping sewists refine their skills and stay updated on the latest trends and tools in sewing.
11.3 Video Tutorials for Advanced Techniques
Video tutorials are a powerful resource for mastering advanced sewing machine techniques. Platforms like YouTube, Craftsy, and Creativebug offer step-by-step guides on embroidery, appliqué, and specialized foot usage. These tutorials demonstrate complex stitches, fabric handling, and machine customization. They also provide troubleshooting tips for common issues like skipped stitches or thread pulling. Visual learning enhances understanding, making these videos indispensable for sewists aiming to elevate their skills and explore creative possibilities with their machines.
Mastery of sewing machines opens doors to endless creativity and practicality. Regular maintenance, practice, and exploring advanced techniques will enhance your sewing journey and foster continuous improvement.
12.1 Recap of Key Sewing Machine Tips
Mastering sewing machines involves regular maintenance, proper threading, and using the right accessories. Always clean and oil your machine, and wind bobbins correctly. Choose suitable fabric-specific stitches and adjust tension as needed. Troubleshoot issues like skipped stitches or thread pulling by checking needle alignment and thread quality. Experiment with specialized feet for heavier fabrics or decorative hems. Practice consistently to refine skills and explore advanced techniques for garment construction and home decor projects.
12.2 Encouragement to Keep Practicing and Exploring
Sewing is a skill that grows with practice, so embrace every project as a step forward. Experiment with new fabrics, techniques, and accessories to expand your creativity. Don’t be discouraged by setbacks—each challenge is an opportunity to learn. Celebrate small victories and remember, sewing is both practical and a form of self-expression. Keep exploring, stay curious, and enjoy the journey of creating something meaningful with your sewing machine.
Leave a Reply
You must be logged in to post a comment.